How to Maintain and Repair Your Doors: A Complete Guide
Disclaimer Some links on this page are Amazon affiliate links which means if you choose to make a purchase, we may earn a small commission from Amazon at no extra cost to you. We greatly appreciate your support!
Doors are more than just a functional part of your home — they’re your first line of defense, a design statement, and a key factor in energy efficiency.
But let’s be real. Most of us don’t think about maintaining our doors until they start causing trouble. Maybe it’s a squeaky hinge, a door that won’t close properly, or those pesky drafts sneaking through the gaps.
Here’s the good news: with just a few supplies and some basic know-how, you can keep your doors working like new. No need for expensive repairs or calling in professionals for every little issue.
In this guide, we’ll walk you through everything you need to know about DIY door maintenance. From quick fixes for sticking doors to step-by-step tips for weatherproofing your front door, we’ve got you covered.
Why Door Maintenance Matters
Routine door maintenance prevents small annoyances from turning into expensive repairs. Here are five habits worth building into your door maintenance routine:
1. Clean Regularly
Wipe down door surfaces and hardware to remove dust and grime, which can wear down finishes and mechanisms over time.
2. Inspect Hardware
Check hinges, handles, and locks periodically for looseness or wear — catching a loose screw early is a lot easier than fixing a sagging door later.
3. Lubricate Moving Parts
How to Do It: Apply a silicone-based spray to hinges, rollers, and other moving parts.
Why It Matters: Lubrication prevents grinding noises and reduces wear on components.
Pro Tip: Avoid heavy oils — they attract dirt and can make things worse.
4. Replace Weatherstripping

What to Check: Look for cracks, gaps, or tears in the weather seal around your doors.
How to Fix: Remove the damaged weatherstripping and replace it with new self-adhesive material.
Why It Matters: Proper seals block drafts, improve energy efficiency, and keep out pests.
5. Test Door Alignment
How to Do It: Open and close the door a few times. Notice if it sticks, scrapes the floor, or feels misaligned.
How to Fix: Adjust the hinges or sand down areas where the door sticks.
Why It Matters: A well-aligned door operates smoothly and prevents unnecessary stress on the frame.
When to Do This
- Light cleaning: Weekly.
- Hardware checks: Monthly.
- Weatherstripping and lubrication: Every 6 months.
- Full inspection: Annually.
Common Door Problems and How to Fix Them
1. Squeaky Hinges
Cause: Lack of lubrication or dirt buildup on hinge pins.
How to Fix:
- Apply a silicone-based lubricant to the hinge.
- Open and close the door a few times to work the lubricant into the hinge.
- If the squeak persists, remove the hinge pin, wipe it clean, and apply lubrication before reinserting.
Pro Tip: Use a small towel under the hinge to catch any drips.
2. Sticking Doors
Cause: Humidity causing wood to swell or misaligned hinges.
How to Fix:
- Tighten the hinge screws.
- Sand down the edge of the door where it sticks.
- Repaint or reseal the sanded area to protect it from moisture.
Pro Tip: Test the door’s path before sanding to identify exactly where it’s sticking.
3. Sliding Doors Off Track
Cause: Dirt buildup or misaligned rollers.
How to Fix:
- Clean the door’s path and tracks with a vacuum or soft cloth.
- Adjust the rollers using the screws near the base of the door.
- Lift and realign the door back onto its track.
Pro Tip: Regularly clean sliding door tracks to avoid future problems.
4. Misaligned Latch Mechanism
Cause: The strike plate isn’t aligned with the door latch.
How to Fix:
- Loosen the screws on the strike plate.
- Adjust its position slightly and retighten the screws.
- Test the door to ensure the latch clicks securely into place.
Pro Tip: If the adjustment isn’t enough, use a metal file to slightly enlarge the latch hole.
5. Rust Spots on Metal Doors
Cause: Exposure to moisture.
How to Fix:
- Sand the rust spots until the surface is smooth.
- Apply a rust-inhibiting primer and repaint the area.
Pro Tip: Use weather-resistant paint for long-lasting protection.
When to Seek Professional Help
If your door frame is broken, the lock mechanism is severely damaged, or you’re dealing with a garage door spring issue, it’s best to call in a pro. Some fixes require specialized tools or expertise to avoid further damage or safety risks.
Specialty Door Maintenance
Not all doors are the same, and different materials require different care routines. Whether you’re dealing with a beautiful wooden door, a sturdy metal door, or a sleek glass door, here’s how to keep them in top condition.
Wooden Doors
Prevent Swelling: Use a dehumidifier in areas prone to high humidity. Sand down any swollen areas and reseal them with a waterproof finish.
Apply a Protective Coat: Repaint or apply a fresh coat of varnish every 2–3 years to protect against moisture and sun damage. Use weather-resistant paint for exterior doors.
Address Cracks: Watch for cracks or splits in the wood, especially around joints. Fill cracks with wood filler, sand the area, and repaint for a seamless finish.
Metal Doors
Combat Rust Spots: Sand rusted areas with fine-grit sandpaper until smooth. Apply a rust-inhibiting primer before repainting.
Check Hinges and Locks: Lubricate metal hinges to prevent grinding noises. Inspect locks for dirt buildup and apply lock-specific lubricants as needed.
Regular Cleaning: Wipe the door with a damp cloth and mild detergent to remove dirt and grime. Avoid abrasive cleaners that can damage the protective coating.
Glass Doors
Keep Them Clean: Use a streak-free glass cleaner and a microfiber cloth to clean the surface. Avoid harsh chemicals that can scratch or damage the glass.
Inspect for Chips or Cracks: Look for any signs of damage and address small chips with a glass repair kit. Replace cracked panels promptly to avoid further breakage.
Check the Tracks: For sliding glass doors, vacuum dirt and debris from the tracks regularly and apply a silicone-based lubricant to ensure smooth operation.
Quick Pro Tips
- Wooden doors need extra attention in areas with high humidity or extreme weather changes.
- Metal doors are durable but prone to rust if not properly painted and sealed.
- Glass doors should be inspected regularly to avoid accidents from unnoticed cracks.
Comparison Table: Care Requirements by Door Type
| Door Type | Primary Maintenance Tasks | Challenges | Pro Tip |
|---|---|---|---|
| Wooden Doors | Clean, seal, and repair cracks. | Warping, cracking, moisture. | Use dehumidifiers to prevent swelling. |
| Metal Doors | Sand rust spots, repaint, lubricate hinges. | Rust, dents. | Use rust-inhibiting primer before repainting. |
| Glass Doors | Clean with streak-free cleaner, inspect seals. | Chips, cracked seals. | Repair chips early to avoid costly replacements. |
| Sliding Doors | Clean tracks, lubricate, replace rollers if needed. | Dirt buildup, misalignment. | Clean tracks monthly for smooth operation. |
Building a Door Maintenance Toolkit
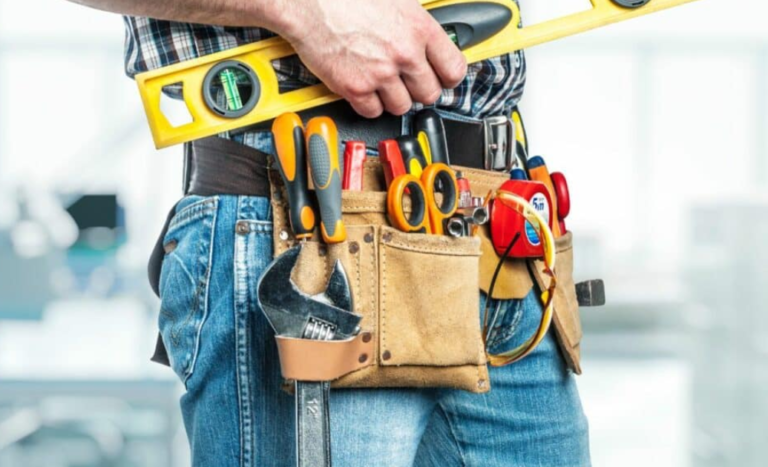
Rather than scrambling for tools mid-repair, it helps to have a comprehensive toolkit ready to maintain and repair your doors. With a few basic tools and supplies, you’ll be ready to tackle most door issues with ease. Here’s what you’ll need:
Essential Tools
- Screwdriver Set: Tighten loose screws on hinges, handles, and strike plates. Look for a multi-bit set to handle different screw types.
- Silicone-Based Lubricant: Keeps hinges, tracks, and other moving parts operating smoothly. Prevents dirt buildup and grinding noises.
- Sandpaper: Smooth out sticking edges on wooden doors. Fine-grit sandpaper works best for small adjustments.
- Soft Cloth and Mild Detergent: Perfect for cleaning door surfaces without damaging the finish. Use microfiber cloths for streak-free cleaning on glass doors.
- Weatherstripping Replacement Kits: Replace worn seals to block drafts and improve energy efficiency. Look for adhesive-backed options for easy application.
Optional Tools for Advanced Repairs
- Wood Filler: Fill cracks or holes in wooden doors before repainting.
- Rust-Inhibiting Primer: Essential for repairing rust spots on metal doors.
- Door Alignment Shims: Fix misaligned doors by adjusting hinge placement.
- Glass Repair Kit: Patch up small chips in glass doors to prevent them from spreading.
Cost-Saving Tip: You don’t need to buy everything at once. Start with the basics and add tools as needed. Many of these items are available at hardware stores or online for under $20 each.
How to Organize Your Tools: Keep your tools in a small toolbox or storage bin for easy access, and label each item so you can quickly grab what you need for specific tasks.
When to Call for Professional Help
While most door maintenance and repairs can be handled with a bit of DIY effort, there are times when it’s best to bring in a pro. Attempting certain fixes without the right tools or expertise can lead to more damage — or even pose safety risks. Here’s when to step back and call for professional help:
1. Broken Door Frames
Signs You Need Help: Large cracks or splits in the frame; structural damage from impact or wear over time.
Why It’s Best Left to a Pro: Frames require precise alignment and reinforcement. A poorly repaired frame can cause further issues with the door’s operation.
2. Complex Lock or Latch Mechanism Issues
Signs You Need Help: Locks that jam or don’t engage properly; high-security or electronic locks malfunctioning.
Why It’s Best Left to a Pro: Locksmiths have specialized tools and knowledge to repair or replace lock systems without damaging the door.
3. Garage Door Repairs
Signs You Need Help: Broken springs, grinding noises, or a door that won’t open or close properly.
Why It’s Best Left to a Pro: Garage door mechanisms involve high-tension springs that can be dangerous to handle without proper equipment and training.
4. Warped or Severely Damaged Doors
Signs You Need Help: Doors that no longer fit in their frames due to severe warping; deep cracks, holes, or broken panels in wooden or metal doors.
Why It’s Best Left to a Pro: Professionals can determine whether the door can be salvaged or if it needs replacement.
5. Automatic or Sliding Door Systems
Signs You Need Help: Automatic doors not responding to controls; sliding doors that come off their tracks repeatedly despite cleaning and alignment.
Why It’s Best Left to a Pro: Electrical systems and specialized rollers often require professional tools and expertise.
Finding the Right Professional
- Ask for Referrals: Friends and family can recommend reliable door repair specialists.
- Check Reviews: Look for highly-rated professionals online.
- Ask Questions: Ensure they have experience with your specific door type or issue.
Estimated Costs for Professional Door Repairs
While prices can vary based on location and door type, here’s a rough breakdown of what to expect:
| Repair Type | Estimated Cost |
|---|---|
| Replacing a Door Frame | $150–$400 |
| Installing or Repairing a Lock | $50–$200 |
| Garage Door Spring Replacement | $100–$300 |
| Automatic Door System Repair | $200–$600 |
| Fixing Structural Door Damage | $250–$500 |
| Sliding Door Roller Replacement | $75–$150 |
If your door requires specialized tools, advanced techniques, or poses safety risks (like garage door spring repairs), calling a professional is the safest and most cost-effective choice. While DIY repairs are empowering and budget-friendly, there’s no shame in knowing when to call in the experts.
Seasonal Maintenance Checklist
Your doors face different challenges throughout the year, depending on the weather. Here’s what to watch for each season:
| Season | What to Do |
|---|---|
| Spring | Clean sliding door tracks. Inspect wooden doors for warping or swelling from winter moisture. Apply a fresh coat of paint or sealant before summer heat arrives. |
| Summer | Check for swelling in wooden doors and sand down sticking areas. Use dehumidifiers in high-humidity areas. Inspect and lubricate hinges and locks. |
| Fall | Replace worn weatherstripping before cold weather. Inspect exterior seals and frames for cracks or gaps. Add a door sweep to prevent heat loss. |
| Winter | Lubricate locks to prevent freezing. Test door alignment and fix loose screws. Use temporary draft stoppers if needed. |
Benefits of Consistent Care
- Energy Efficiency: Properly sealed doors can reduce energy loss by up to 15%, saving you money on heating and cooling costs.
- Longevity: Regular maintenance can extend the life of your doors by years, avoiding costly replacements.
- Enhanced Security: Functional locks and sturdy doors mean better protection for your home.
One homeowner replaced their weatherstripping annually and saved an estimated $200 on heating bills over three years — small efforts add up.
Conclusion
Your doors are more than just entryways — they’re essential to your home’s security, energy efficiency, and aesthetic appeal. Staying on top of door maintenance means you avoid costly issues, extend their lifespan, and keep them operating smoothly year-round.
Here’s a quick recap of what we’ve covered:
- Routine maintenance practices like regular cleaning, lubricating, and weatherproofing prevent most door problems.
- Common repairs like fixing squeaky hinges or sticking doors are manageable DIY fixes.
- Wooden, metal, glass, and sliding doors each have unique needs.
- Structural damage, advanced lock issues, or complex systems often call for professional attention.
For more on doors and hardware, explore the rest of Door Digest.